
Calendar
The user can access the Calendar page either by clicking on a check-in card from the Home page or directly from the main menu. The page has two tabs, the Social calendar, and the Personal calendar one.
Personal Calendar
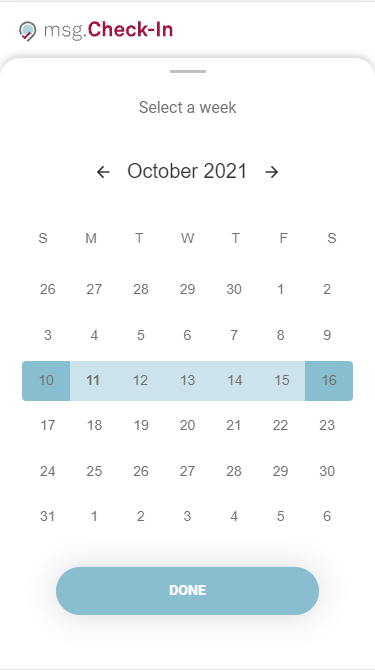
On the Personal Calendar tab, all check-ins for the logged-in user are displayed. There are two views, a week view with all the check-ins from a certain week and a day view.

On mobile, the week and the day views are displayed using a drawer, which permits switching from one month to another by swiping left/right. In case of the week view, when the user selects a day, the whole week will be selected and coloured.
Once you select a check-in, you can view the check-in details and a detailed map. To identify who is sitting next to you, simply hover your cursor over the profile picture of your colleague on the map. On mobile or tablet devices, you can tap on the profile picture to view the same information. A pop-up window will appear, displaying the name and position of the colleague in question. This feature allows you to quickly locate and connect with your colleagues, making it easier to collaborate and build relationships with your team.

It is also possible to delete and edit (in case of single check-in) the selected check-in or to add a parking check-in. Also, in case the user is the owner of a team check-in, they have the possibility to update that check-in by managing the team members. During the manage members flow an already checked-in user can be removed from that check-in or a free user can be added to that existing booking.
Moreover, the user has the possibility to create a check-in directly from their Calendar for a day in the future in which there are no check-ins available. By clicking on the plus button (+) (week view)/Check In button (day view), the user will land on the Check-In Tab and after choosing a building, the date picker will already contain the selected date from the calendar.

Social Calendar
An additional feature is the Social Calendar. If this feature is enabled by your System Administrator the calendar card will have two tabs available, one with the user's own check-ins and the second one with his colleagues' check-ins. By default, the user will see the check-ins of the colleagues that he/she is following, but this can be changed in order to display check-in information about the colleagues from his/her teams or the check-ins made for his/her guests (if the user is a Front Desk Admin). The user can also search for a certain colleague and switch between day or week view.
The Team Owner is marked for each team and displayed in the Social Calendar on the first position.

To access further details about a check-in, the user needs to click on it, which will open up a new view containing a map of the selected location. The map allows the user to easily identify who is sitting in the same room by hovering over the profile pictures of their colleagues, which functions similarly to the "Personal Calendar" section.

From this view, a user can choose a location to create a check-in next to a colleague by selecting the desired place. A confirmation pop-up will appear once the pin is clicked. By clicking the Check In button, the registration is created and the user will be directed to their Personal calendar.

If the user already has a conflicting check-in for the selected date and time, the pop-up will prompt them to edit their check-in. If the user selects "Edit" they will be taken to the edit flow so that the updates can be done.
In case a user chooses to search for a specific number of colleagues and not go with the predefined settings of seeing the followed colleague or the ones that are part of his/her team, he/she can then always choose to come back to the default functionality by clicking the "Clear All" button which deletes all the selected users from the search list.