
Home Page
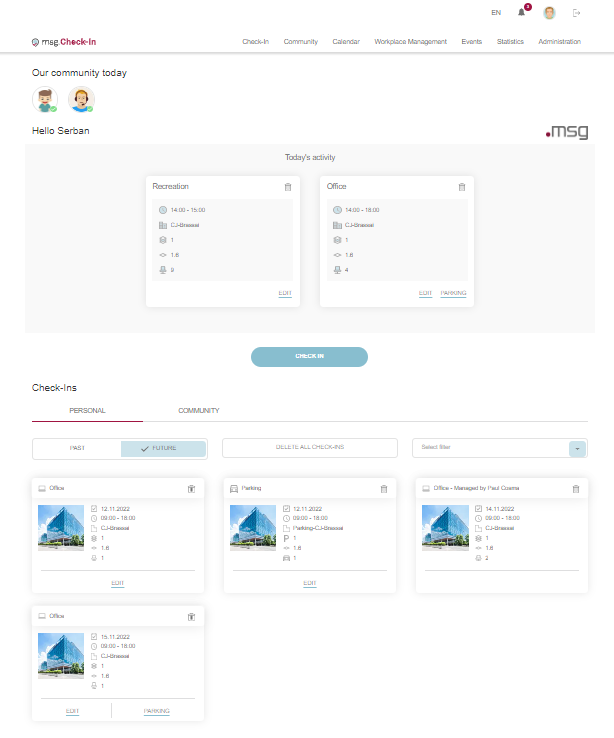
The Home Screen of the msg.Check-In app offers useful information for the user regarding his/her current check-ins, previous and past check-ins, and about the current check-ins of his/her community:
Our community today
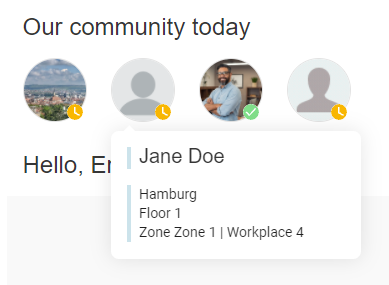
The first section available is the one showing the check-ins of the user's community for the current day. On the lower right-hand side of the user's photo, a colored icon is displayed to inform if the user's check-in is confirmed (green) or not (yellow). By clicking on one entry the user can see the name and department of that colleague and the information regarding the place where he/she has the check-in for today.
Today's activity
Today’s activity section displays all the user's check-ins from the current day. In case of a single check-in, after clicking the card, the user navigates to My Calendar section where all the pieces of information regarding the selected check-in are displayed. In case of a team check-in, the navigation is done to the Social Calendar section, where the corresponding team is automatically selected.
If on a certain building, the admin has set the check-in confirmation functionality (for office and/or parking), then the user must validate his/her check-in in order not to lose the place. The validation process is done in this section by pressing the Confirm button displayed below each check-in. The Confirm button is neither visible for check-ins made in the cafeteria nor for check-ins made in the recreation room. If a check-in is not confirmed within 30 minutes after the chosen starting time, it is automatically invalidated, and the place becomes available. Users who have the notifications (push and/or e-mail) enabled will receive reminder messages to confirm their check-ins if they have not already done so.
At the end of the section, there is a quick action button that takes the user directly to the check-in process.

Personal Check-ins & Community Check-ins
Check-Ins section is organized into two tabs: Personal and Community.
Personal check-ins tab contains all the user’s single check-ins and the check-ins which were made by someone else for the user as part of a team check-in. The user can switch between their previous check-ins and future check-ins (by default, the future check-ins will be displayed).
The future check-in cards are displayed in chronological order, and by clicking them, the user navigates to My Calendar section, where the details about the selected check-ins are displayed. Each card has a delete button. Also, each workplace check-in entry has the option to create a new parking check-in by pressing the corresponding button (if this feature was activated by the System Administrator). Add parking button is not available for cafeteria/recreation check-ins or for the check-ins, which were made by someone else. The single check-in cards also contain the Edit button which allows the users to modify an existing check-in by changing the place, date and time.
By clicking on the Delete all check-ins button, the user has the possibility to delete all their future check-ins.
The previous check-in cards are displayed in reverse chronological order. These entries are displayed for view-only purposes, but there is a button attached to the cards for the check-ins which were made by the user, called Check-in again. By clicking it, if the same place is available for check-in for the next day for the same time interval and if the user doesn't have a check-in, the check-in is automatically created and displayed in the future check-ins section. Otherwise, the user will be informed about this fact, and he/she can choose to start the check-in process or cancel the action. This card is not displayed if the Administrator selected zero days as the time interval for which all the check-in information is being kept since no historical data is available.
Moreover, the user can filter their previous/future check-ins in accordance to the check-in type:

Community check-ins tab displays all the team check-ins created by the user and the check-ins created for the guest team. The user can switch between past and future check-ins and can filter their check-ins in this section as well.
The previous cards section is displayed for read-only purposes.

After clicking on a future check-in card, the user navigates to Social Calendar, having the corresponding team selected. Also, these cards contain a button called Manage Members. By clicking it, the user lands on a new page, where they can update the team check-in, by removing members from the check-in, adding members to the check-in, or even updating the place for some members. The user can't change the date/time of the check-in. All the changes will be applied after clicking on the Update Check-in button. In case the user changed their mind, they can click on the Cancel button.

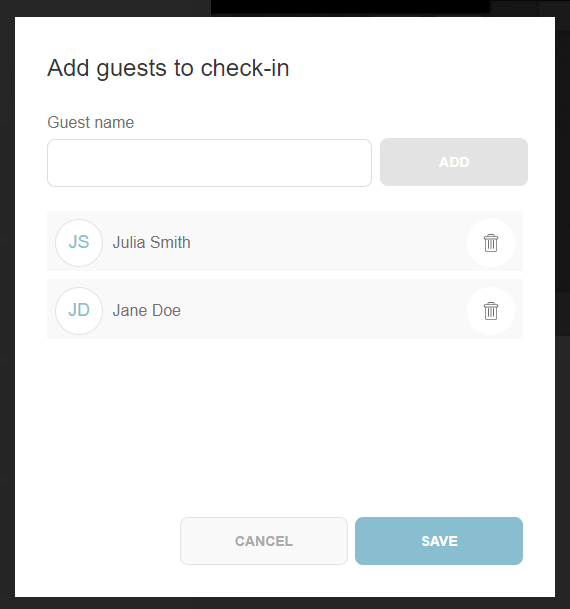
Moreover, if the user manages the members of a guest team check-in , they have the possibility to add guests directly from this page, by clicking on the Add members button. A popup will be displayed, in which the user can introduce the names of the guests they want to add. After clicking on the Save button, the members will be added at the beginning of the list, but also under the Guest Management section in the Community menu.
For the future check-ins which correspond to guest check-ins, the user has the possibility to add a parking check-in for this type of user as well, if this feature is available.